Sunday, October 14, 2007

Finished!

It's done! I wouldn't say it was quick, but it was definitely pretty easy aside from the cable. The individual stitches on the cable weren't any more difficult than most vertical cables, but it was still difficult because of the really long rows. It was easy to lose track or get a little off (and a huge pain to go back and undo it). Also, you don't have the visual cues of being able to see how it should fit together as you do on a vertical cable. But I think that I could design horizontal cables to use in other places now, so it was definitely good to learn. This was also my first project that used short rows and button bands. Yay! More new skills.

Yarn: Knitpicks Palette in Garnet Heather
Needles: US 3 circs for body/yoke, US 4 dpn's for sleeves
(however, my gauge was off and it ended up smaller than it was supposed to)

For more, stop by my blog

Saturday, October 13, 2007

Wide sleeves?

Anyone else finding the sleeve instructions make for a much wider sleeve, especially at the cuff, than the pattern photo shows? I've had to redo mine 3 times to get a good fit. I just have one sleeve and the button band to go!

Monday, October 8, 2007

Quick Update

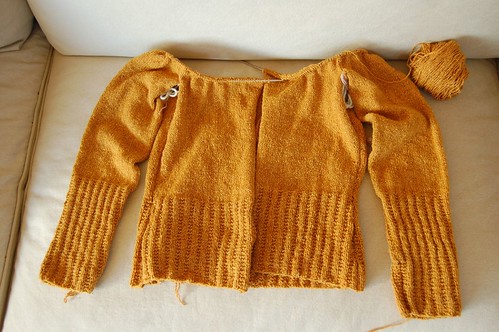
Just a quick little update. I'm currently finished with the main body and am knitting up the sleeves. I'm using the magic loop method that Kendyl described here to knit them up, and so far so good! It took me a little while to figure out, but now I'm rolling! Anyway, here are a few updated pics:

Saturday, October 6, 2007

Getting Ready for the Yoke

Get it? Yoke? The color is sort of egg yoke? Ok, maybe I'm just a little punchy. I joined the previously knitted sleeves and I'm nearly at the very exciting but slightly intimidating yoke, oh boy!


Isn't this yarn yummy? I am in total lust with this yarn. Silky Wool from Elsebeth Lavold. The color, the texture, the smooth way it knits up. Pure. Love.

However, the pattern is a bit problematic for the novice. I feel somewhat sacrilegious in criticizing Eunny - but there is an error in the increase section for the body and the directions for joining the sleeves are less than clear. And then there are the 2 completely useless markers one stitch from each edge. Huh? Isn't there enough to worry about without messing with a stitch marker flopping about and threatening to fall off each row turn? Those little ##$@^$^ fell off one to many times and I got rid of them. So there.

Erm... I must be close to that time of the month. Except - I don't do that anymore! Guess I'm just a bitch.

But... isn't she lovely? I am 20 rows away from the yoke. I can't wait, but I am a tad fearful. Will Eunny flummox me again? we shall see....

Friday, October 5, 2007

Tangled Yoke Finished

My Tangled Yoke Pullover is finished! I have a feeling it's not what some of you expected it to look like. First, I'll show the photos and then explain why and how I did what I did. (It's a hazy odd day out; I had a lot of trouble getting decent photos. This yarn changes color depending upon the light, which is very noticeable here. The sideways photo is the truest to color.)


The grafted under arm:


As you can see, I chose to do a Henley style neckline -- preserving the split at the front of the cardigan. For larger pictures, an explanation of why I went that route, and details on all of the other changes I made, you can read my more complete post at my blog, which is found here.

Tuesday, October 2, 2007

To Seam (Stitch) or Not to Seam Stitch

As I merrily plow ahead with my Tangled Yoke, I thought I'd share one of the changes I made. The instructions, which are for a cardigan (I'm knitting this as a pullover), call for you to knit the entire piece (back and fronts) back and forth with a purl stitch running from the hem to the under arm to give the look of a seam. I did that, but wasn't sure I liked how it looked. So, in order to see if I would like it better without the faux seam, I undid it on one side. Here's what I mean.

First, here is a shot of the side "seam."


To remove it, I first dropped the purl stitch all the way down to the garter rib. (I wasn't going to undo the seam stitch there because it provides a focal point for the decreases.)


Then, using a crochet hook, I laddered the stitch back up -- turning it from a purl stitch to a knit stitch.


Without the seam stitch, the side looks like this:


I liked how that looked better, so before I joined the sleeves and body for the yoke, I undid the seam stitch on the other side as well. Important note: I conducted this experiment before I finished the garter rib on my first sleeve, so I could decide whether or not to add the seam stitch to the sleeve under arm. I wanted the sleeves and body to match, obviously.

I'm almost finished with the whole thing. If not tonight, then tomorrow.

Monday, October 1, 2007

Top down progress

Here's what I've got so far. It rolls under in front so it looks like it doesn't meet, but it just barely does if you unroll the edges. Should be good once I add the button band. I added 3 short rows for the bust area. So far, so good I think.